
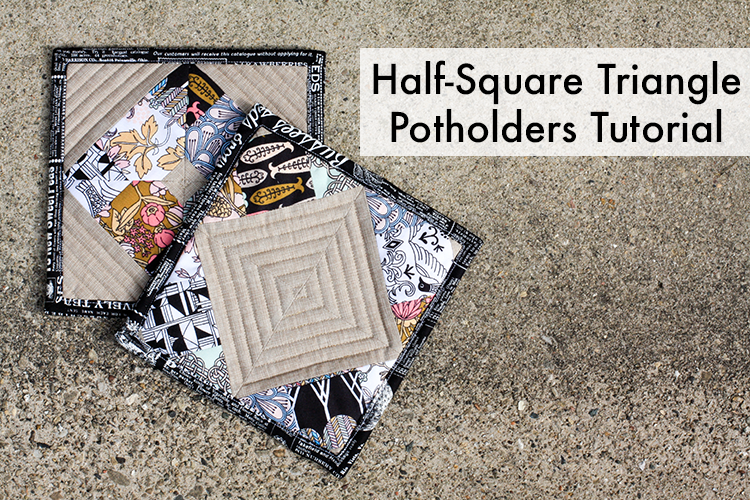
Hello! Today I have a tutorial for these fun patchwork half-square triangle potholders to share! If you're new here, welcome! I hope you'll take a peek around, be sure to check out my HST Block of the Month and my book, Patchwork Essentials: The Half-Square Triangle!

This was originally published as a part of the Festival of Half-Square Triangles.

After making my Patchwork Chevron Quilt earlier this year, I've been playing around with adding patchwork to half-square triangles in other ways! We'll start with simple nine-patch blocks to make these fun pot holders! Materials and instructions will make two 7.5" potholders!
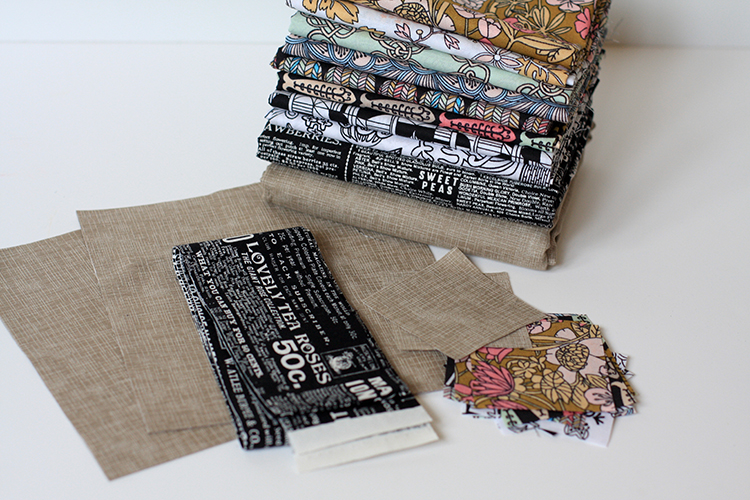
I always make my pot holders with a layer of quilt batting (I use Warm & Natural/White), and a layer of Insul-Bright* (which is heat resistant). I used Miscellany by Julia Rothman* for Cloud 9 Fabrics, Quilter's Linen* in Beige by Robert Kaufman for the background, and Annie's Farm Stand by Lakehouse Dry Goods for the binding. I quilted them with Aurifil #2325* cotton thread.
Sewing Level: Intermediate
Finished Size: 7.5" square
Materials (for two potholders):
- (16) 2.5" print squares
- (2) 2.5" background squares
- (2) 6.5" background squares
- (2) 9.5" backing squares
- (2) 9.5" batting squares
- (2) 9.5" Insul-bright squares
- (2) 2.5"x42" binding strips
Seam Allowance: 1/4" unless noted
This would be a great project to use up scraps! Including those pesky weird shaped batting pieces you end up with after a large project! :)
Instructions:
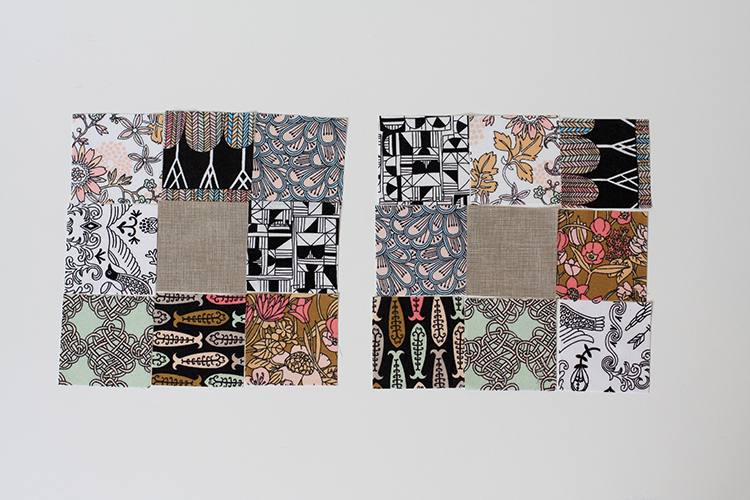
1. Lay out your print squares into two nine-patches, both with the background 2.5" square in the center.
2. Stitch together nine-patches and press seams open.
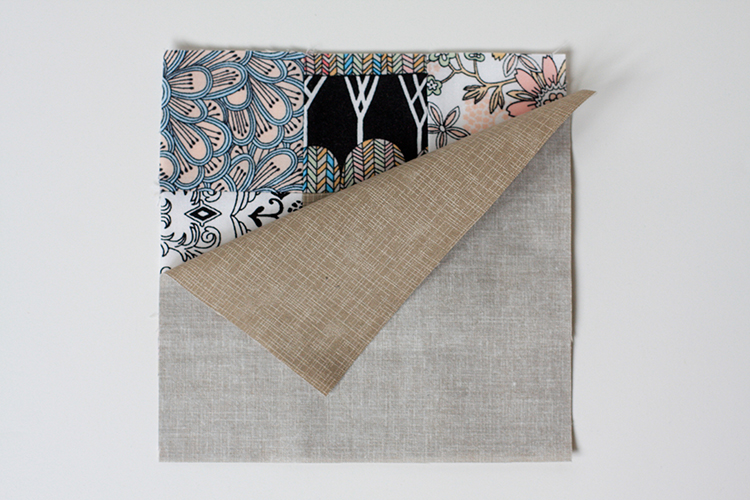
3. Place nine-patch and background square right sides together.
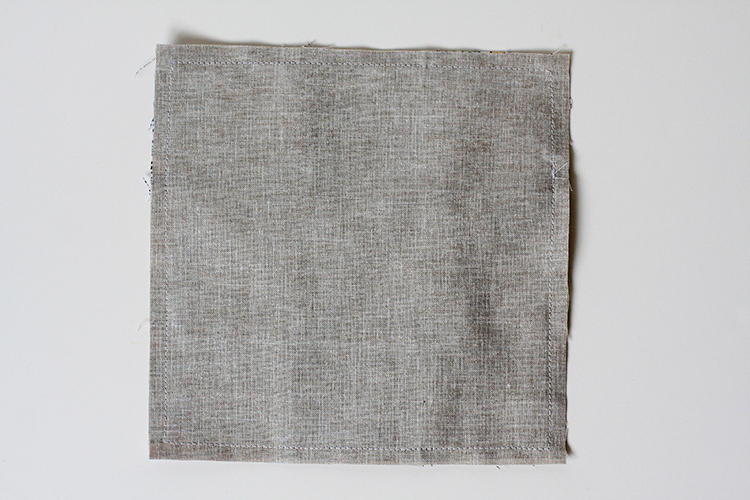
4. Sew a 1/4" around all four sides. Lightly press.
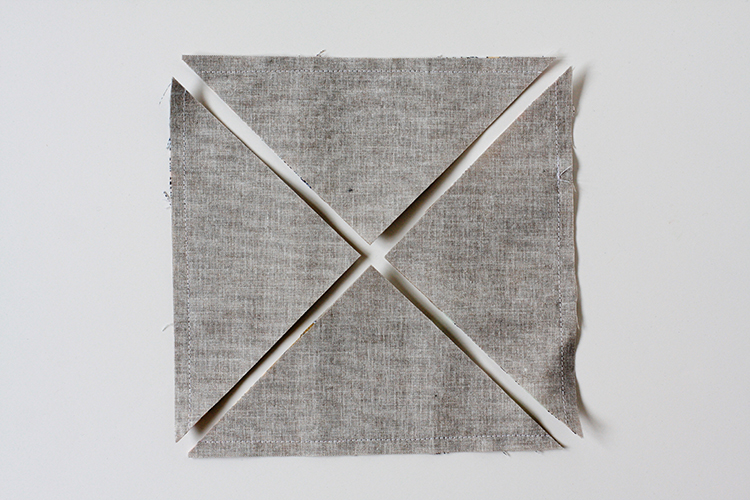
5. Using a ruler and rotary cutter, cut along both diagonals.
*Note: You are cutting along the bias, so if you're nervous about stretching, I'd recommend using a little starch or a starch-alternative! My favorite is Flatter by Soak*!
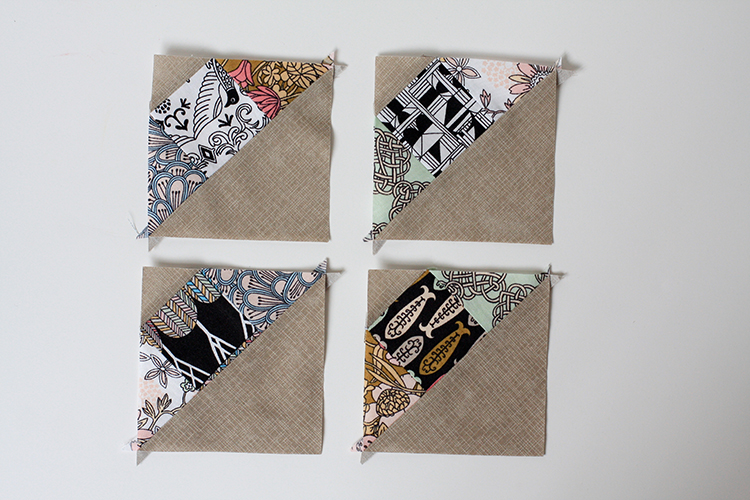
6. Press all four half-square triangle units, seams open. Repeat with remaining nine-patch and background square.

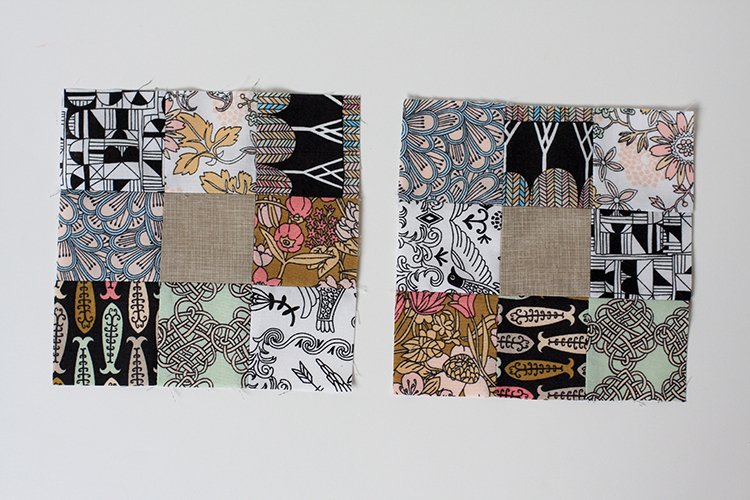
7. Trim half-square triangles to 4" square. Arrange your half-square triangles as shown above.
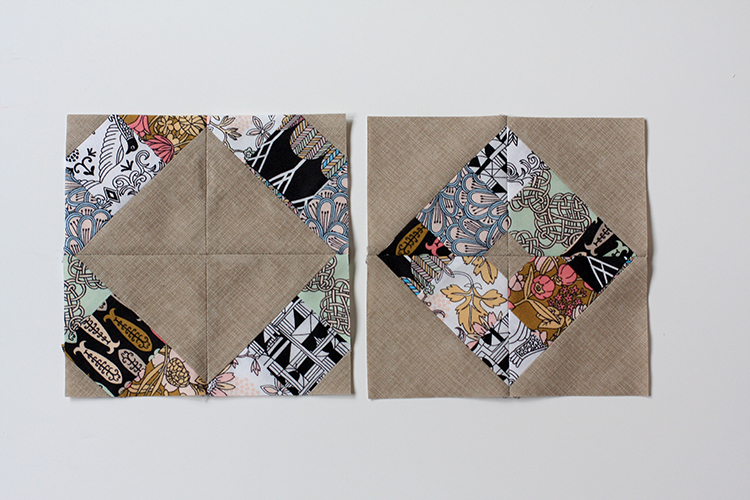
8. Piece together and press seams open. Trim to 7.5" square.
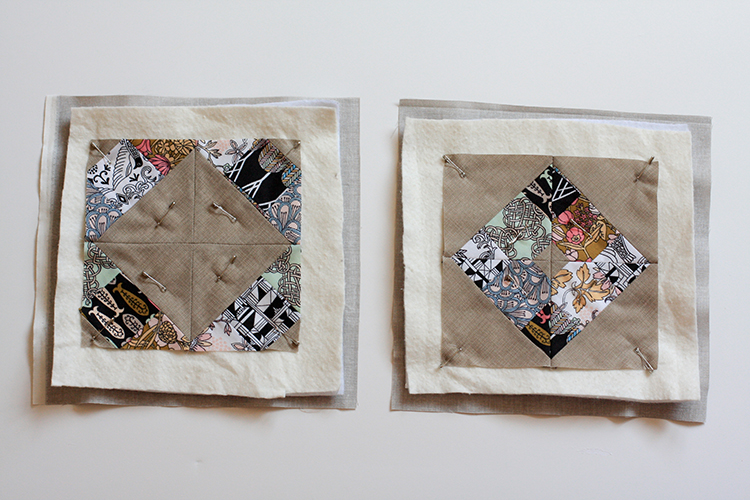
9. Layer your pieces with the backing square right sides facing down, then the layer of insul-bright, then the batting, then the pot holder top, right sides up. Baste! (Tutorial on basting if you need it, here!)
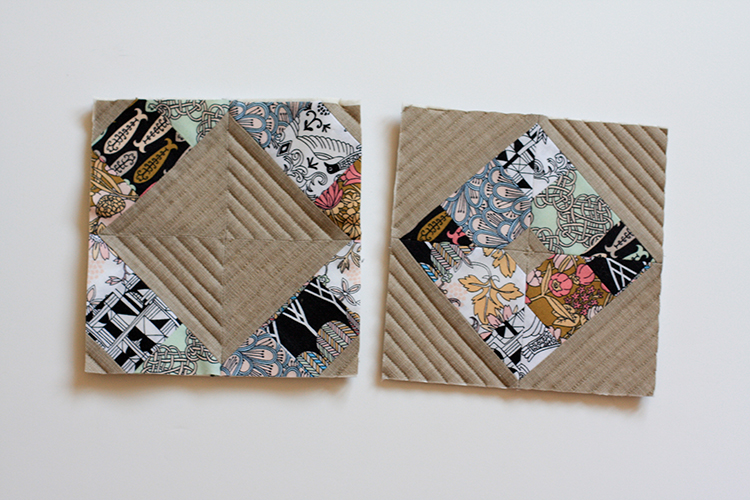
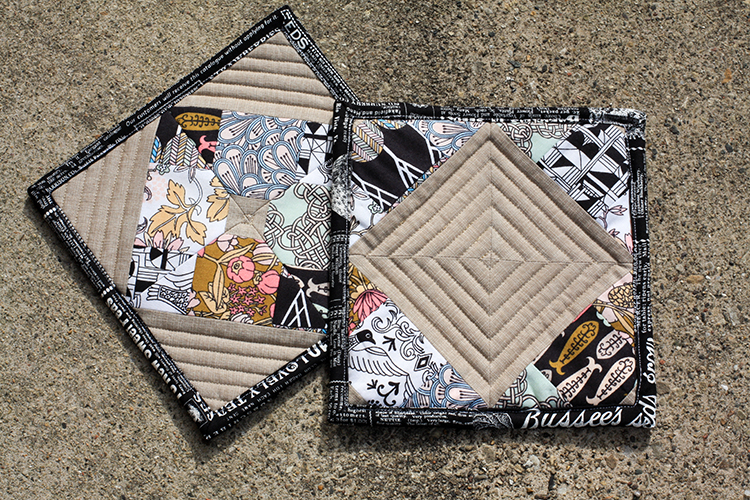
10. Quilt as desired (I machine quilted mine, using a walking foot!) and trim away excess backing, batting, and insul-bright. Bind (I machine bind both sides, you can find my tutorial for it, here)! Voila, you're done!
I hope you've enjoyed this tutorial! I have lots of other tutorials for everything from quilts, pillows, bags, and holiday items to informational series and techniques. Find all my tutorials here: Tutorials. My online shop is filled with patterns for quilts and bags. Find my patterns here: Jeni Baker Patterns
If you make something using one of my tutorials or patterns, I hope you'll tag me @jenib320 and use my hashtag #jenibaker on instagram!
Happy Quilting!
*Note: Any links marked with an asterisk in this post are affiliate links. This means if you click through and buy something, I make a small commission, at no extra cost to you.
I love this idea!
ReplyDeleteWhat an easy to follow tute. Thank you!
ReplyDeleteGreat potholders! thanks for the tutorial ~ making some soon!
ReplyDeleteI love the way these are put together by using the nine patches to make HST's, V clever!
ReplyDeleteHi, Jeni! Did you hand quilt or machine quilt your pot holders? I can't tell from the pictures, but your lines are so straight and even they are totally close-up-worthy! :-)
ReplyDeleteОй как красиво!!!!!!!! Браво!!!! Заберу себе в копилочку.
ReplyDeleteJeni,
ReplyDeleteThanks for the tutorial! Can you tell us what the brown fabric is? I love it!
Also, rudic says "Oh how beautiful!!!! Brava!!!" Didn't understand the last part, though :)
great job, neatly done. jealous too. gotta try this for my sew along, i am learning the nine patch
ReplyDeleteI love this! I just learned that technique from the Craftsy Block of the Month class! Love your fabrics!
ReplyDeleteLove them!! Make very pretty presents too.
ReplyDeleteOh, I love them and I love the fabrics you are using! This was a new technique to assemble them on. Love it!
ReplyDeleteWow. I want to be your neighbor and bring you cookies and cakes so you'll bring me gorgeous hot pads like these. :) They're beautiful. Thank you for the great tutorial.
ReplyDeleteVery cool! Love the design and quilting. Love everything!
ReplyDeleteSo pretty, beautiful fabrics.
ReplyDeleteSo pretty, beautiful fabrics.
ReplyDeleteWhat a great idea! =D
ReplyDeleteGoodness, those turned out reaaaaaaally cute.
ReplyDeleteWow. What a great tutorial and such a good use of scraps. Also these would be a nice gift.
ReplyDeleteLove these, Jeni! I recently acquired a bundle of these fabrics and have been trying to figure out how to use them. I guess I'm kind of a dork because I can sit and wait and wait and wait when I get fabric without a predetermined project. I have to come up with a project that will really make the fabric shine (I normally buy fabric only after having a project I want to make, so as to eliminate waste and the tendency to let it sit). I love this project and might just use it!
ReplyDeleteThank you so much for all these great tutorial. Alo for all the great Tutorials you put on Pininterest and your blog too. You are awesome.
ReplyDeletePatti xxx
ohh I love these pot holders. Thanks for the awesome tutorial. I really need to replace most of mine. Thanks again.
ReplyDeleteJeni -- these are lovely! I think I might make myself a set of them this weekend. :)
ReplyDeleteLove this technique for HST. Adds interest to old technique. Need to try this. Great fabric.
ReplyDeleteI used your tute and made some... Love them! Thanks for the easy to follow instructions. I'm making more... Great as a gift.
ReplyDeleteThese look so fantastic! Love the tutorial...it's not how I thought they were made at first. Intriguing, and headed for my to-do list.
ReplyDeleteI love them! Was looking for a great potholder and this is it. Cant wait to make them!
ReplyDeleteWhat a clever piecing time saver!
ReplyDeleteAdorei!!! Muitas idéias...
ReplyDeleteObrigada.
Duda
Love it!!!! Love it!!! Love it!!!!
ReplyDeleteLove these pot holders, and the quilting too. Going to try this one for sure. Thank you for sharing.
ReplyDeletelove how you did these potholders, esp when you sewed the outside of the square to make the hst. I use this method all the time and its great for hst.
ReplyDeleteI have been searching for ideas to make for several wedding showers and these potholders are by far the best! I also see the idea for towels and pinned it too. Any other ideas would be appreciated!
ReplyDelete