
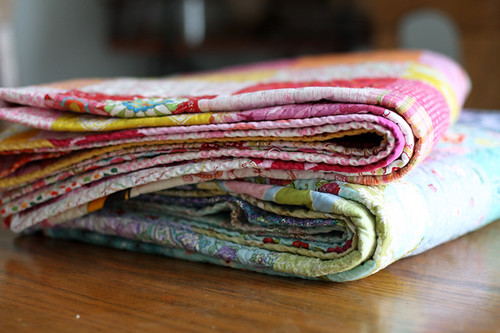
See my two finished quilts here: Warm Colors Quilt + Cool Colors Quilt.
Sewing Level: Beginner Friendly
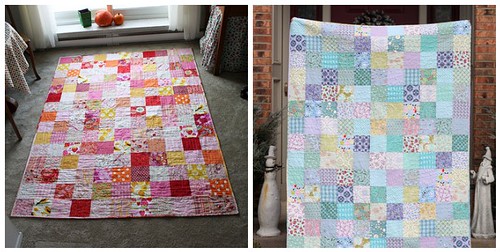
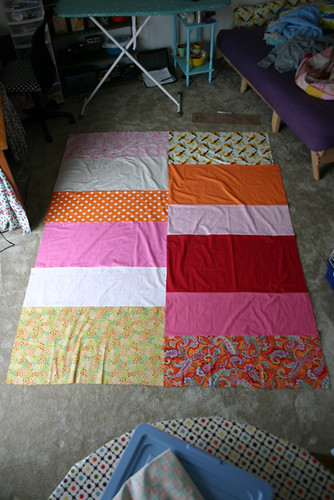
Finished Size: 61"x83"
Materials:
- 20 fat quarters of Color A*
- 10 fat quarters of Color B*
- 5 fat quarters of Color C*
- 5 fat quarters of Color D*
- 5 1/4 yards of backing fabric
- 69"x91" piece of cotton quilt batting
- 5/8 yard of binding fabric
- Colors Patchwork Quilt Worksheet (download here)
*1/4 yard cuts can be substituted.
Instructions:

*Use 1/4" seam allowance unless otherwise noted.*
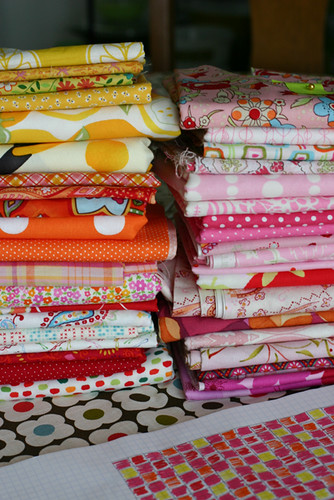
1. First and foremost, you will need to choose 4 colors (A, B, C, + D) for your quilt. You may choose to use warm or cool color schemes, but this method would also work with any color scheme you’d like. Use the above worksheet to lay out your colors if you'd like, or come up with your own arrangement!
2. Rank your 4 colors in order of importance. You will need a main color (A), secondary color (B), and two additional colors (C and D). Now, choose 20 fabrics from your color A, 10 different fabrics from your Color B, and 5 different fabrics from colors C and D. This will give you a total of 40 different fabrics.
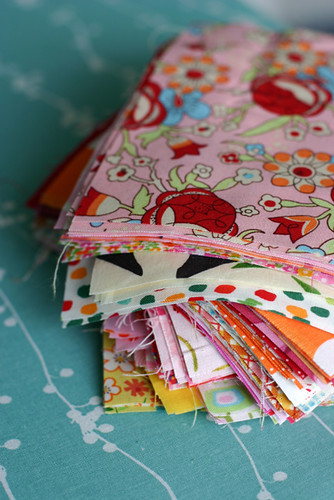
3. Cut out your squares as follows:
Color A – 83 squares of your main color. Use 20 different fabrics.
Cut (5) 6" squares each from 3 fabrics, cut (4) 6" squares each from 17 fabrics.
Color B – 40 squares of your 2nd color. Use 10 different fabrics.
Cut (4) 6" squares each from 10 fabrics.
Color C – 21 squares of your 3rd color. Use 5 different fabrics.
Cut (5) 6" squares from 1 fabric, cut (4) 6" squares each from 4 fabrics.
Color D – 21 squares of your 4th color. Use 5 different fabrics.
Cut (5) 6" squares from 1 fabric, cut (4) 6" squares each from 4 fabrics.
For a total of 165 squares.
*A 6" square acrylic ruler is really handy here. The nice thing about 6" squares is that most standard acrylic rulers are 6"x24". This allows you to use your ruler as a template to cut a 6" strip and then cut 4 squares from each strip.
4. With your colored in worksheet in hand, lay out your squares in 15 rows of 11 squares each. This process requires a certain amount of patience depending on your preferences. I decided I did not want any one fabric to appear in the same row or column. While this may not seem possible, it indeed is! It takes a while to get it just right I suggest working on it for a bit and then coming back to it later if possible. If this issue doesn’t bother you, don’t worry about it. Fiddle with the arrangement until you like it.

5. Now that you’re done with your placement, you’ll want to stack up your rows so that you sew them up in the correct order. I choose to stack the squares moving from left to right, starting at the top of my quilt map.
6. You should now have 15 stacks of 11 squares each. Label the top of each row with a slip of paper attached with a safety pin.
7. Sew your squares together for each row. Depending on your preference, iron your seams open, or you may choose to press towards the right or left. I suggest doing this after you have a few rows completed. This breaks up the sewing a bit and doesn’t leave you with a ton of ironing at the end/
8. Now it’s time to sew your rows together! I suggest sewing your rows together in pairs, 1+2, 3+4, etc. You can then sew your pairs together and continue until you’ve finished. This system helps minimize the amount of bulky sewing you’ll have to do. Just like with your rows, don’t forget to press your seams.
9. Time for the backing! For my two quilts, I choose to try and use up leftover fabrics that I used in the front.
10. I would suggest making your backing about 4" bigger on each side to allow for some shifting during quilting. This makes your backing piece 69"x91". I’ve done two different pieced backings, the first is to split it down the middle using various sized pieces that are 35" wide, just making sure you end up with two 35"x91" pieces that are then sewn together. Another option is to piece strips. Each pieced strip needs to be 69" long, and the stripes sewn together need to add up to 91". Or, keep it simple and use yardage!
11. Basting: Using masking or painter’s tape, tape the backing to a clean, hard surface, right side down. Spread out batting on top of the backing, smoothing out any wrinkles. Carefully spread your quilt top on top of the batting, right side up. You now have a quilt sandwich. Starting in the center of your quilt sandwich, place your first pin, making sure to catch all three layers. Continue to place pins every few inches, securing the layers together.
12. Quilting: Quilt as desired, by machine or by hand. Trim away excess batting and backing fabric.
13. Binding: Trim off selvedges and sew your binding strips together to form one long strip, press seams open. Fold in half lengthwise, pressing with your iron as you fold. Attach binding using your preferred method. For a detailed tutorial on attaching your binding to both sides by machine, see here.

Quilt, bind, wash, and enjoy!
Thank you ... nice tutorial.
ReplyDeleteOooh! Thanks! :)
ReplyDeleteLove the quilts. Thanks for the how-to...can't wait to give it a go!
ReplyDeleteYour quilts are lovely! Now I just need to learn how to quilt :)
ReplyDeleteJana
This looks great, thanks. Not too challenging for a newbie!
ReplyDeleteThis is a wonderful insight into something new for me... I was kind of wondering how you get the 'random placement, multiple fabrics' look whilst still putting thought into it and making sure it would work. Thanks for doing all the math for us :)
ReplyDeleteThose are just lovely...I especially like the blue one. I'm a little pattern-phobic, but I might just try this one. Squares seem pretty do-able to me! Thanks for sharing.
ReplyDeleteOh wow. I love this! Your quilts are so beautiful. I just clicked over from WhipUp and I'm so glad I did. I would love to link to this post if you didn't mind.
ReplyDeletei love this quilt...adorable!
ReplyDeleteHi this is beatiful, may I ask what did you use for batting? Thank you
ReplyDeleteVery pretty quilt. I just tried to download the quilt map and it appears the link is no good. Is there any way to obtain this now?
ReplyDeleteThank you for the help and great tutorial.
vburr at charter dot net
Hi Jeni, I found your tutorial on "One Pretty Thing", I have made three quilts now, using your layout and instructions. I am delighted with how they've turned out, such a brilliant stash buster! Thankyou thank you thankyou.
ReplyDeleteLynda, Cornwall, UK
just came across this on pinterest...your colors are absolutely perfect. love.
ReplyDeleteyou make quilting look so easy!!! I'm really wanting to try it but I'm sewing challenged!!
ReplyDeleteI have always wanted to do the quilt thing and since it is the beginning of a new year, I do believe I will give it a try for a few Christmas gifts for 2012. Just one thing, I don't seem to be able to find anything about the batting. Please advise. Love your gift to all, the tutorial. Thank you. Harriet monsolete@yahoo.com
ReplyDeleteGorgeous and fresh. Thank you for sharing
ReplyDeleteThanks for the great lesson. I plan on making one of these this summer.
ReplyDeleteLoved your pattern..needed one for spring or summer..Used a prewashed piece of flannel(good quality) and layed both pieces right sides together. sewed around all four sides leaving an opening to turn right side out. sew closed. no binding needeed and used embrodery thread to make ties to hold together..My grandaughter loves it. Thanks again..will keep watching.
ReplyDeleteThank you for this I have a new machine, and I want to try my hand at a quilt.
ReplyDeleteCould you let me know how many blocks I would need for a full size quilt? I need it to be big enough for it to hang down about 6 to 8 inches on each side. Thank you.
ReplyDeleteHow big was the finished quilt? I want to make a baby quilt and thinking I could half this one?
ReplyDeleteThanks for such useful tips
ReplyDeleteThank you soooo much for this VERY helpful tutorial! I LOVED the colour selection process you suggested we go through because colour selection is my biggest struggle.
ReplyDelete